Glue Your Mix!

WORKING WITH MIX BUS COMPRESSION
You’ve probably heard about the idea of getting your mix to “glue” together. It’s usually talked about like it’s some mythical, magical process that only the top engineers know about, and maybe for a time that was true…but not anymore! Most modern digital consoles can achieve the kind of “glue” that we’ll be talking about today just by using their onboard dynamics processing. Additionally, companies like Waves make incredible plug-in software tools that recreate the sound of classic analog studio mix-bus compressors that were previously unavailable to live sound engineers. So, let’s learn how to get some glue!
First, with mix-bus compression, as with most compression, less is more. Literally. When we compress a signal, it loses dynamic range (the difference between the loud parts and soft parts of the music). So in this case, when were trying to compress our ENTIRE mixed signal, we need to be REALLY careful not to over compress. Sometimes you can get away with an over-compressed snare drum or even a vocal, but you’ll never get away with your whole mix having too much compression.
Too much compression will destroy the dynamics of your song and make it sound flat, dull, lifeless, and even fatiguing to the listener’s ears. At most, I look for 3 or 4 dB of compression on my mix-bus compressor during the loud parts of the song. Any more than that, and I feel like it’s compromising the dynamics that I was trying to achieve in the mix.
So now that we know what it shouldn’t do, let’s talk about what mix bus compression SHOULD achieve. As with any form of compression, mix bus compression effectively flattens the peaks of your signal (like the kick and snare hits) while raising the level of the other elements in your mix. It’s basically an automatic volume control that will lower the level of loud things, and raise the level of soft things. You can see what that looks like right here:
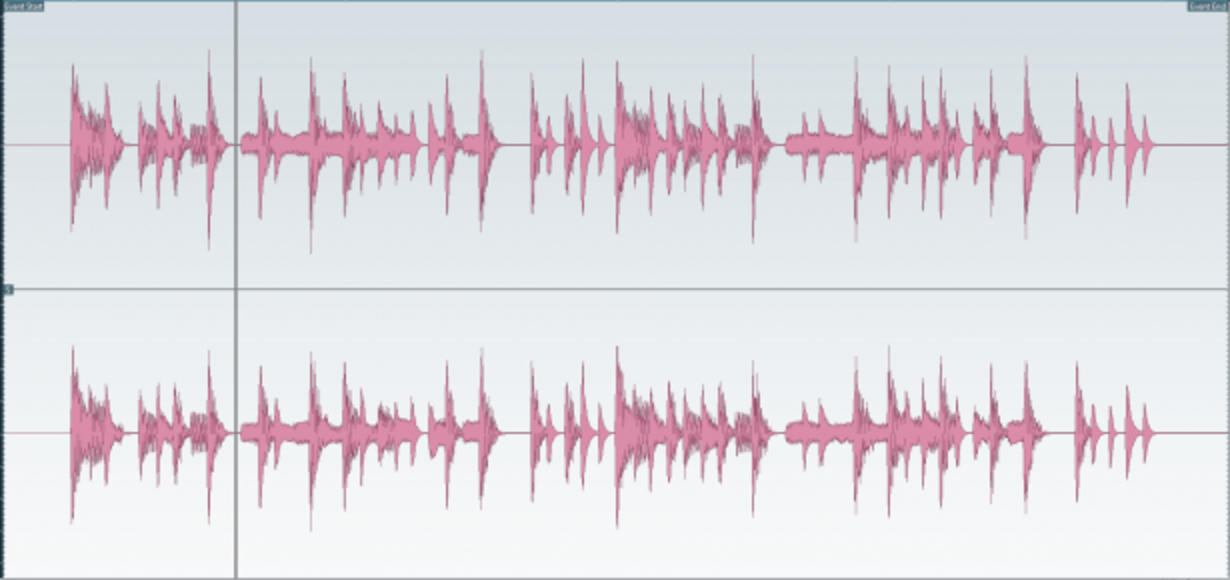
In the first image, you can see the waveform of the audio that is uncompressed. Those big peaks are where the kick and the snare are hitting. The stuff in between is the rest of the band. You can see how it’s MUCH softer than those kick and snare hits.

Next is a compressed signal, you can see that some of the peaks have been reduced, and the overall level has been brought up. This looks like some pretty aggressive compression, but it illustrates the point well.
Basically, the mix is made to sound more cohesive and “glued” by reducing the level of some elements that are loud, and increasing the volume of elements that are softer. It sounds like the individual elements are glued together, rather than being separated and individual. This results in a mix that is more “dense” sounding and feels more full and powerful and punchy.
So now, we know what it should and shouldn’t do, so let’s get into some details!
I like to start with a relatively slow attack value on my compressor. One of my favorite mix-bus compressors, the Waves SSL Bus Compressor Plugin, has an attack value that goes as high as 30 milliseconds…which is still really fast, but in the world of audio compression, that’s actually on the slower side of things. Some people like a faster attack. That’s fine…but sometimes I feel like a fast attack can get too aggressive for my taste. To me, somewhere in the 20 to 30-millisecond range retains the punchiness that I like in my mixes, and still controls the loud elements really well.
Next is the release setting. I tend to like a fast release, which sounds more transparent, but other people like to adjust the release to sort of be “timed” to the music. Either way, you want to make sure that your release is fast enough that the compressor full releases and isn’t just slammed all the time.
As far as ratio, I like to go low. I’ll start at a 2:1 ratio, but sometimes I’ll go as much as 4:1, but never more than that, or the compression tends to be too noticeable on the whole mix. You can think of ratio as simply controlling how “intense” the compression is. The higher the ratio, the more noticeable and severe the compression will be.
Once I have my attack, release, and ratio at a good starting point, it’s time to adjust my threshold (the point at which the compressor activates and starts compressing) until I’m getting that magic 3-4 dB of gain reduction. That’s where the magic glue starts happening!
If you want to deep-dive in to compression, EQ, effects, building a great mix, and much more, make sure to check out our in-depth video training course for church sound engineers: Sound Guy Essentials. You can learn more by clicking right here!
So what compressors and settings do you like on your mix bus? Leave a message below, or talk to us on Facebook, Instagram, or Twitter to let us know!
Keep cranking that bass!
-Worship Sound Guy


Responses